 着色器学习(四) 一些内建变量的使用
前一篇
参考地址:https://docs.godotengine.org/en/4.1/tutorials/shaders/shader_reference/shading_language.html
# 内建变量
# UV
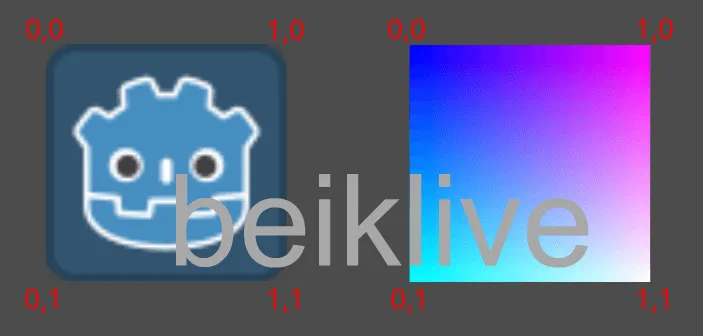
UV 是一个二维变量,包含了纹理坐标的X和Y分量。
UV 取值在0-1之间, 从左到右, 由上到下.
void fragment() {
  COLOR = vec4(UV, 0.5, 1.0);
}
1
2
3
2
3
上面代码使用
UV的xy分量作为 COLOR的 r 和 g 分量效果:
# TEXTURE
TEXTURE 表示当前片段着色器中使用的纹理
下面代码使用UV坐标从TEXTURE中采样颜色,并将结果存储在textureColor中。
然后赋值给当前片段的COLOR
void fragment() {
    // 使用UV坐标从纹理中采样颜色
    vec4 textureColor = texture(TEXTURE, UV);

    // 将采样到的颜色赋值给COLOR
    COLOR = textureColor;
}
1
2
3
4
5
6
7
2
3
4
5
6
7
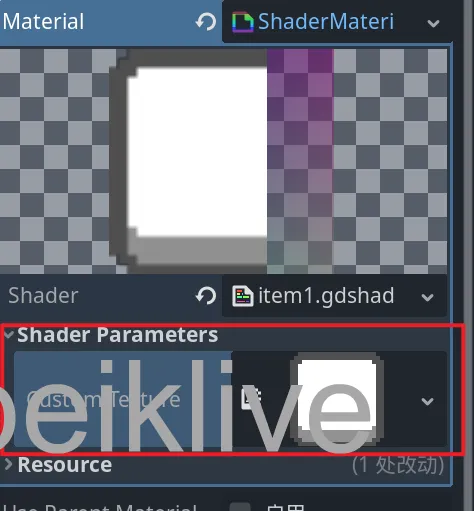
同理, TEXTURE 是当前着色器的纹理, 也可以加载自定义的纹理
下面代码就是使用自定义的纹理变量给与到当前片段
shader_type canvas_item;

uniform sampler2D custom_texture : hint_black_albedo; // 声明一个sampler2D类型的uniform变量

void fragment() {
    // 在片段着色器中使用custom_texture进行纹理采样
    vec4 sampledColor = texture(custom_texture, UV);

    // 对采样到的颜色进行处理,例如修改颜色值
    sampledColor.rgb *= 0.5; // 将颜色值减半

    // 将处理后的颜色赋值给COLOR
    COLOR = sampledColor;
}
1
2
3
4
5
6
7
8
9
10
11
12
13
14
15
2
3
4
5
6
7
8
9
10
11
12
13
14
15
这样就可以在 gd脚本中 控制纹理
extends Node2D

func _ready():
    # 获取你的节点(这里假设你的节点有一个ShaderMaterial)
    var sprite = $Sprite

    # 获取节点的材质
    var material = sprite.material as ShaderMaterial

    # 确保材质存在且具有uniform变量 custom_texture
    if material and material.has_shader_param("custom_texture"):
        # 加载你的纹理
        var texture = preload("res://path/to/your_texture.png")

        # 将纹理赋值给custom_texture uniform变量
        material.set_shader_param("custom_texture", texture)
    else:
        print("Material or shader param not found.")
1
2
3
4
5
6
7
8
9
10
11
12
13
14
15
16
17
18
19
2
3
4
5
6
7
8
9
10
11
12
13
14
15
16
17
18
19
# 示例
以下着色器实现了两个纹理分别占用左半边和右半边
shader_type canvas_item;

uniform sampler2D custom_texture;
uniform float center_line : hint_range(0,1) = 0.5;

void fragment() {
	vec4 sampledColor = texture(custom_texture, UV);
	sampledColor.a = 0.8;
	vec4 tempColor = vec4(UV.x, UV.y, 0.9, 0.5);
	// 使用 mix 函数混合左右两部分颜色
    vec4 finalColor = mix(tempColor, sampledColor,  step(UV.x, center_line));

    COLOR = finalColor;
}
1
2
3
4
5
6
7
8
9
10
11
12
13
14
2
3
4
5
6
7
8
9
10
11
12
13
14
:::tip{title="提示"}
这里用到了 mix函数
mix(x, y, a);
其中:
x 和 y 是要插值的两个值,可以是标量、向量或颜色。
a 是插值因子,它决定了 x 和 y 之间的权重。
在0到1的范围内,a 的值为1时结果为 x,为0时结果为 y。 :::
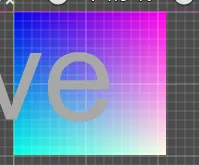
未设置 sampledColor 时是这样
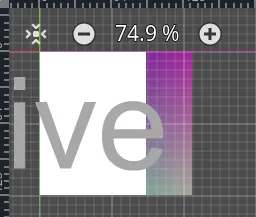
我在这里加入了自己绘制的纹理
效果如下

编辑 (opens new window)
上次更新: 2024/05/22, 14:11:38